Quick Installation Guide
CMS Cloud Quick Installation Guide
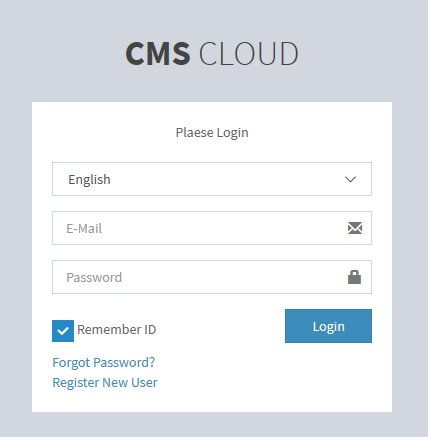
- ⑴ Please click on the button go to access CMS Cloud website.
-
⑵ Login with previously provided id and password. If you are new user, Click “Register New User.
-
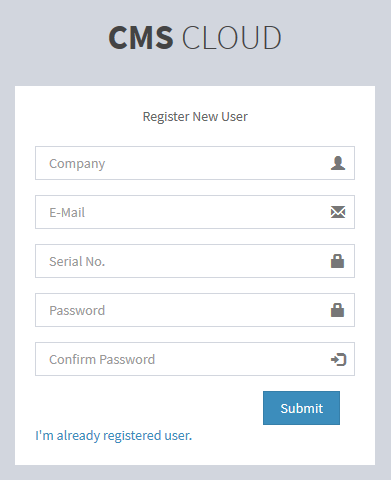
⑶ Please enter your information according to the field, remember, “E-Mail” and “Serial No.” must be same from the information provided of CMS license email.
-
⑷ If you already have login access, you may update information, go to “Settings > Manager”.
Click “Edit” button in “Options” column to edit information of selected user.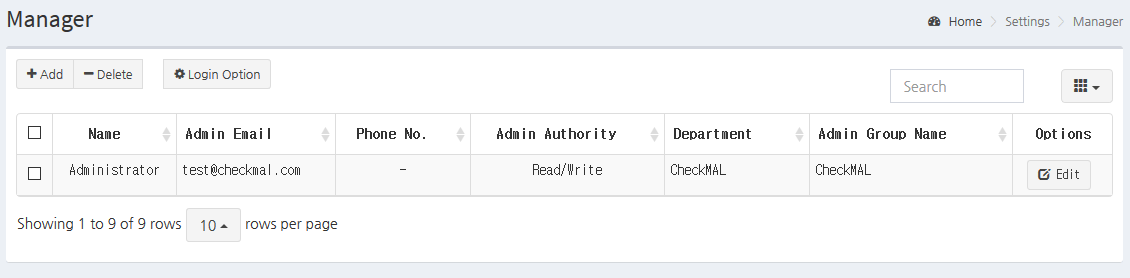
You may change the password by entering new password in “Password (enter at change)” field.
-
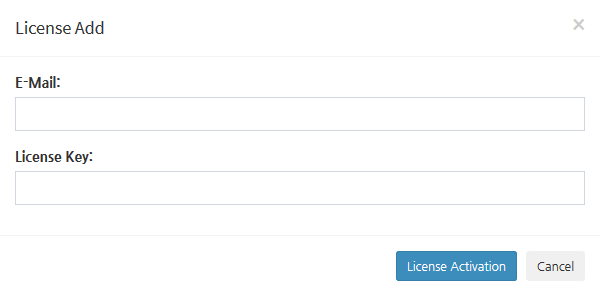
⑸ Add your licenses to “Settings > License” and “+ Add” button. This action makes your licenses managed by in CMS.
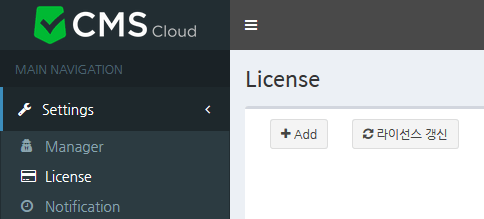
If your license is already renewed, please click “Refresh” button to fetch updated information.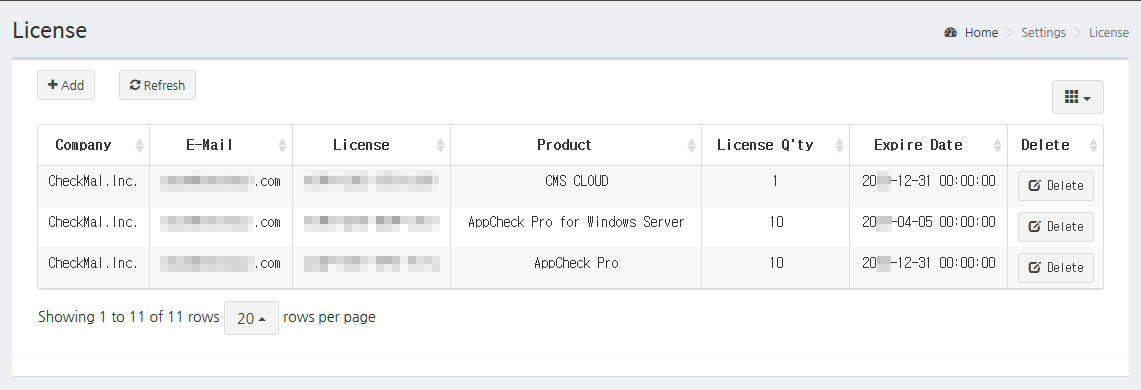
-
⑹ After license is registered to CMS, please go to “Distribution” and download installer.
- Installation File: User may manually enter “Username” during the installation process. Also, user needs to click Next on each step during installation process.
- Silent Installation File: OneClick Installer is provided, and installation process is not displayed. User name is automatically taken from Windows User Login Name. -
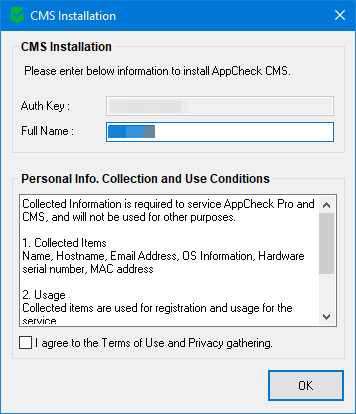
⑺ Please do not change filename of downloaded installer as it contains information required during the installation process.
By executing installer, authentication key is automatically shown, and you may guide users to write “CompanyName_Username” for management ease.
User must check “I Agree to Terms of Use and Privacy gathering” and click “OK” to continue the installation process.